Showing posts with label grill. Show all posts

Saturday, July 30, 2022

NO OVEN? NO PROBLEM!


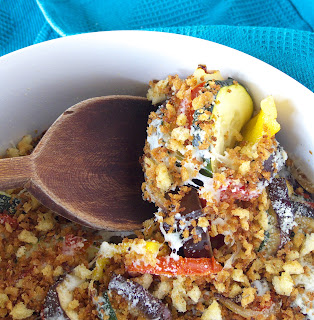
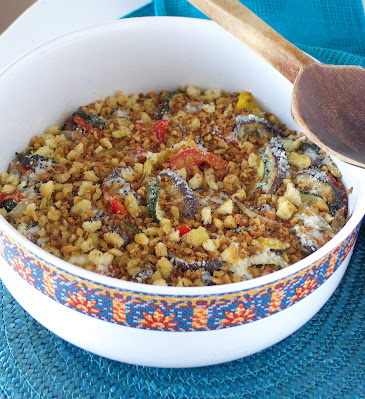
Looks like a gratin, no? Summer vegetables cooked in the microwave are topped with cheese and crispy breadcrumbs. No oven needed.

Would you turn on the oven to make a summer vegetable gratin? That was a question posed in one of my food groups on Facebook. My answer: NO WAY. I don’t turn on the oven from the first of June until mid-September. That’s been the house rule for years. But now, with heat waves coming earlier and more severe (we hit 40ºC/104ºF a few days ago), we will have to extend the oven ban from May until October. Scary. 


If using the oven is out of the question, how to cook in the summer? I long ago stopped making baked goods, so that’s no problem. But I miss a weekly roast chicken, a simple preparation that’s good the first time round, with leftovers to last a few days. And, yes, I remember making summer vegetable gratins. How to adapt?

Andalusians have traditionally not used ovens at all. No roasts nor oven casseroles. So summer fare just means faster top-of-the-stove cooking—fried fish and gazpacho being a perfect summer meal. In the old days, paella cooked, on a wood fire, nowadays it’s still cooked outdoors, on a gas ring big enough for a huge paella pan. Fat bell peppers are roasted on the parilla, wood-fired grill, or else purchased with fresh bread at the village panadería, where the peppers are roasted in bread ovens.

At my house, I have adapted the roast chicken for the gas grill on the patio. And, the gratin, while not legally gratinée, works pretty well in the microwave.  

Vegetables cooked in the microwave soak up the olive oil, but keep their shape and texture. Fried bread crumbs added before serving give the vegetables some crunch. Serve this dish hot or cold, as a starter or side. It would make a great vegetarian main accompanied by rice or bulgur.


My summer substitute for oven-roasted chicken. Small, spatchcocked chickens are quick to cook on a grill.  


Leftover grilled chicken makes a great summer salad with cheese and tangy olives.


Microwave Summer Vegetables with Crumb Topping
Verduras al Microonda con Crujiente de Migas

I make a quite acceptable eggplant Parmesan in the microwave, after first frying the slices of eggplant in a skillet. This is different in that all the vegetables are layered raw. They never become totally soft as with an oven-baked casserole, but keep their texture very nicely. I’ve added the crunchy bread crumbs after removing the vegetables from the microwave.

A ceramic tian casserole is perfect for this dish, as long as it fits inside your microwave unit. A deep-dish glass pie pan is a good alternative as is an earthenware cazuela or any round, flat-bottomed bowl with straight sides. Presumably, microwave-safe plastic would work, although I didn’t try it. 

Slice vegetables.
The vegetables need to be cut in fairly equal ¼-inch slices. Salt the eggplant slices and let them stand in a colander 15 minutes so they release excess liquid. Slice the tomatoes, salt them lightly and lay on a plate. When assembling, lift them and discard the liquid. 

I used a vegetable peeler to peel the bell peppers.

You can use more or less of the listed vegetables or swap others. If you use sliced potatoes, sweet potatoes, carrots or butternut squash, steam or parboil them before layering with the other vegetables. 

Serve the vegetables hot, room temperature or cold. Sprinkle with the crispy crumbs right before serving. Cold, the vegetables are good with a squeeze of lemon.


Serves 4-6.

For the crumb topping:
3 slices day-old bread (5 ounces), crusts removed
3 tablespoons olive oil
1 clove garlic, chopped
Pinch of dried thyme or parsley

For the vegetables:
Olive oil
1 cup reserved crumbs
1 onion
2-3 medium eggplant (1 pound)
3 plum tomatoes
1 medium zucchini and/or yellow squash (12 ounces)
2 bell peppers, yellow and/or red
Salt
Freshly ground black pepper
Basil leaves, torn
1 ounce thinly sliced cheese
2 ounces grated cheese
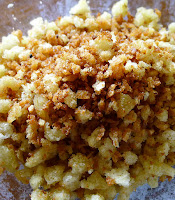
Crispy bread crumbs.
Tear the bread into pieces. Use a food processor to chop it into coarse crumbs. You should have about 2 ½ cups crumbs.

Reserve 1 cup of the crumbs to layer with the vegetables. 

Heat the oil in a skillet. Add the remaining 1 ½ cups of crumbs and fry them until they begin to turn golden. Add the chopped garlic and continue to fry until crumbs are browned and crispy. Stir in thyme. Remove crumbs from the skillet.


Oil a microwave-safe dish. Spread the reserved 1 cup of crumbs that were not fried in the bottom of the dish.

Heat 1 tablespoon of oil in a skillet. Cut the onion in thin julienne slices. Sauté until they are softened and beginning to brown, 4 minutes. Remove from the heat. Spread half of the onions in the bottom of the dish on top of the crumbs.

Slice the eggplant crosswise into rounds. If eggplant is very large, cut the slices in half. Salt them lightly and leave 15 minutes  in a colander to drain. Pat them dry with a paper towel. Slice the tomatoes crosswise. Salt them lightly and lay flat on a plate.

Overlap sliced vegetables in dish.
Slice the zucchini, peppers and any other vegetables selected into more-or-less equal-sized pieces. Sprinkle with salt and pepper. 

Arrange the eggplant, tomato, zucchini and pepper slices in overlapping rows in the dish. Push slices of the sautéed onion and sliced cheese between the sliced vegetables. Tuck pieces of basil between the vegetables. When all of the vegetable slices have been incorporated, drizzle 2 tablespoons of oil over the top. 
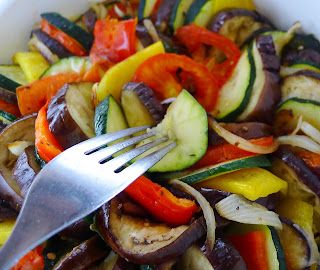


Test vegetables for doneness.
Cover the dish with plastic wrap or a microwave plastic lid. Microwave on High for 5 minutes. Microwave on Medium-High until vegetables are done to taste, about 15 minutes. The heavy dish will be very hot, so use oven mitts or a towel to protect hands when removing the dish. 

Remove the lid or plastic wrap. Sprinkle the grated cheese on the top of the vegetables. Return the dish to the microwave uncovered. Microwave on Medium-High for 5 minutes. Leave the dish in the microwave for at least 5 minutes.

Before serving, sprinkle the top with the crispy crumbs. 


Grilled Chicken
Pollo a la Parilla

Two-pound chickens


These supermarket chickens come two to a package, each weighing only 2 pounds. Once spatchcocked and opened flat, they cook very quickly on the grill (40 minutes or so). “Dry brining” helps to keep them juicy.

Try different spice blends. I’m currently experimenting with Middle Eastern za’atar, a mixture of thyme, oregano, sumac and sesame seeds. Other mixes to try: Spanish pinchito spice, Moroccan ras el hanout, Indian garam masala. Or make up your own. 


2 small (2-pound) chickens
Salt
Freshly ground black pepper
Olive oil
Spice-herb blend such as za’atar
Lemon juice

Spatchcock (butterfly) the chickens by cutting out and removing the back bone, opening the chicken out and pressing the breastbone to flatten it. Sprinkle the chickens on both sides with salt and pepper. Leave them, uncovered, in the refrigerator for up to eight hours.

Before grilling, brush the chickens with oil. Sprinkle them with the spice-herb mixture and squeeze lemon juice over them. 

Preheat grill. Grill the chickens, bony-side down, over indirect heat for about 30 minutes. Douse any flare-ups and adjust the position of the chickens so they don’t burn. Turn them skin-side down. Grill until golden-brown and done in the thickest part. (Test by cutting into the thigh to see if juices run clear.)  

Allow the chickens to rest 10 minutes before serving. Or, store refrigerated, for use in chicken salad (recipe follows).

Chicken Salad with Olives
Ensalada de Pollo con Aceitunas

Cut leftover grilled chicken into strips or cubes for the chicken salad.

The slight sweetness of vinegar made from Málaga wine complements the vinaigrette for this chicken salad. PX vinegar would also be good. Both are mellow and less sweet than balsamic.
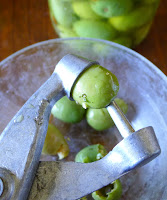
Trusty olive pitter!
Serves 2 to 3.

2 cups cooked chicken, cut in strips or cubes
Salt
Freshly ground black pepper
½ cup sliced pitted green olives
¼ cup seedless black grapes
2 tablespoons diced celery
1 tablespoon diced red bell pepper
2 tablespoons finely chopped onions
2 ounces cheese, cut in strips or dice (½ cup)

1 teaspoon Dijon mustard
1 ½ tablespoons Flor de Málaga vinegar
½ teaspoon salt
¼ teaspoon pimentón de la Vera (smoked paprika)
3 tablespoons extra virgin olive oil
Salad greens to serve
Cherry tomatoes to garnish
Sprigs of fresh herbs to garnish

Place the cut-up chicken in a bowl. Season with salt and pepper. Add the olives, grapes, celery, red pepper, onions and cheese. Mix gently.

In a jar combine the mustard, vinegar, salt and pimentón. Stir well. Add the oil. Cap the jar and shake it until dressing is smooth.

Stir the dressing into the chicken and combine well. (If not serving the salad immediately, store it, covered and refrigerated.) Spread plates with salad leaves. Spoon the chicken salad on the greens. Garnish with cherry tomatoes and sprigs of fresh herbs.


More recipes for the microwave:


Another way to use the grill instead of the oven:

Saturday, August 5, 2017

THE REMAINS OF THE BARBECUE

When I fire up the grill on the patio, it’s never just to cook one meal. It requires so much  charcoal and/or olive wood to make a bed of coals on only one side of it that I try to get as many foods on it as possible. 


Use coals to cook foods in several shifts.

So, if there’s steak or ribs or a boned leg of lamb for tonight’s meal, then there are adobo-marinated chicken legs to grill for tomorrow. Eggplant, peppers, corn in the husks, potatoes wrapped in foil, whole onions, garlic, leeks. Some of the vegetables are flame-roasted while the fire is just getting started; others are grilled over the dying coals after other foods have been removed.

Roasted corn that we don’t eat at the first meal I will add to a salad of black beans and green beans. The eggplant and onions and garlic become escalivada, a Catalan dish that can be served cold or room temperature.


Charred eggplant, pepper, onion and garlic to make escalivada the next day.

Grill-roasted eggplant, green and red peppers, onions and garlic--add olive oil, lemon juice and it's escalivada.  Mash the soft, roasted garlic with some of the pepper juices and oil and drizzle over the vegetables.

Serve escalivada as a side dish or heap it on toasts as a tapa.


Bell peppers--roast them today, use them tomorrow.

Tomatoes can be roasted right on the grill or in an aluminum foil pan. They're easy to peel.

A heap of roasted red bell peppers, peeled and torn into strips and dressed with olive oil becomes a favorite summer salad.

This time, the remains of the barbecue—roasted peppers, tomatoes and potatoes—inspire me to make an Aragonese dish, cordero al chilindrón, a lamb stew with summery flavors.


Red bell peppers and tomatoes make this lamb stew a summertime dish.

Tender lamb cooks with grill-roasted peppers, tomatoes and potatoes.

Chilled rosado wine goes with a summer stew.


This festive dish is usually served accompanied by patatas fritas, fries, or potatoes cooked right in the stew. I took advantage of left-over roasted potatoes from the grill, adding them to the lamb and peppers at the end of cooking.

A summer stew needn’t be served piping hot. Let it set 10 or 15 minutes before serving. A chilled rosado wine and sliced garden tomatoes complete the meal. 

Lamb Stew with Red Peppers
Cordero al Chilindrón

Peppers and tomatoes may also be roasted in the oven or under the broiler--but the smoky aroma of the grill gives them an extra dimension.

Use any boneless cut of lamb for this stew—shoulder, leg, loin, breast. 

Serves 4.

4 red bell peppers, roasted, peeled and seeded
1 ¾ pounds lamb, cut in 2-inch chunks
Salt
Freshly ground black pepper
Pinch of thyme
Flour for dusting meat
3 tablespoons olive oil
2 onions, julienned
2 cloves garlic, chopped
1 ½ cups peeled and chopped roasted or raw tomatoes
Red pepper flakes (optional)
½ cup white wine
2 baked potatoes, peeled and cut in pieces
2 ounces serrano ham, diced (½  cup)
Chopped parsley to garnish


Tear the roasted peppers into strips and reserve.

Season the meat with salt, pepper and thyme. Dust it with flour (the meat doesn’t need to be coated with flour).

Heat the oil in a cazuela or deep skillet. Add the lamb and brown it on all sides, Remove the meat and reserve.

Sauté onions and roasted pepper strips.
Add the onions to the pan and sauté 5 minutes until they are softened. Add the garlic and the strips of red pepper. Sauté on medium heat 5 minutes. Add the tomatoes and red pepper flakes, if using. Fry on medium heat 5 minutes. Add ½ teaspoon salt and the wine. Bring to a boil. Return the lamb to the pan. Cover and simmer 20 minutes.

Turn the meat and continue cooking until lamb is very tender, about 30 minutes more. If using the cut-up baked potatoes, add them about 10 minutes before lamb is ready.

Add the diced ham and heat 1 minute.

Allow the stew to set 5-10 minutes before serving. Garnish with chopped parsley.


The remains, for another day.

Recipes for escalivada, here and here.
Another recipe for lamb stew with red peppers, this one for winter is here.
Another recipe for chilindrón, this one with chicken is here. My chilindrón recipes from Aragón are made with red bell peppers, but in Navarra and La Rioja, chilindrón usually is made with dried red peppers called choriceros. Choricero peppers are a mild (not hot), bittersweet chile also used in making chorizo sausage.

Saturday, May 30, 2015

LET THE GRILLING SEASON BEGIN!

I missed the “official opening” of the grilling season (Memorial Day is not a holiday in Spain), so I’m opening the season this week, celebrating the arrival of a new (used) charcoal/wood grill. 


Ben grills ibérico pork, asparagus, potatoes and mushrooms over charcoal.

At the supermarket I got a big hunk of Ibérico pork, fresh asparagus and a bag of charcoal. I had on hand onions and potatoes newly dug from the garden. To complete the menu I made a two-bean salad with green beans from the garden and a jar of kidney beans. 

Ibérico pork is raised to make the famed Ibérico hams and cured shoulders. Some of the other cuts are used for various kinds of sausages (chorizo, morcilla, salchichón, lomo, morcón). The remainder is marketed as fresh pork.

Ibérico pork, fresh and cured, comes from animals of the Ibérico breed.  What distinguishes this breed from regular porkers (such as Large White, Landrace and Duroc) is that they are very slow to mature, never reaching the size of hogs destined to be pork chops. The Ibérico breed, as it adapted to its habitat, acquired the unique characteristic of storing fat infiltrated in the flesh. The marbled meat is what makes it so juicy, the perfect meat for grilling.

The cut I bought was the presa, a thick, boneless slab from the shoulder, weighing about 1 ½ pounds. Even though this is not de bellota—acorn finished—it is naturally marbled with fat. It stays juicy and tender, so doesn’t need brining.

Cut of ibérico pork called presa, rubbed with garlic and herbs.

I chose to give the piece of meat a rub of chopped garlic, thyme, rosemary, sage, salt and a spoonful of vinegar and allow it to set at room temperature for one hour.

Son Ben was the grill master—he’s had lots of experience. We tucked foil-wrapped onions into the embers, placed asparagus, par-boiled potatoes and mushrooms right on the grill with the meat.

Ready to flip the meat? Note foil-wrapped whole onions are roasted in the embers under the grill.
Smoke, the added flavor. Next time, we'll try an olive-wood fire instead of using charcoal.

Let meat set 5 minutes before carving.

Serve ibérico pork medium rare, like beef. We decided this was a little too bloody. After carving off the ends, we put it back on the grill for another few minutes.

Salad on the side--green beans from the garden, red kidney beans, cherry tomatoes, chopped onions with an olive oil-yogurt dressing.

Some sauces that would go nicely with the pork and potatoes: Fig Salsa, Quince Sauce, Green Chile Sauce.

Fresh ibérico pork cuts are available in the US from http://www.wagshalsimports.com/ and  http://www.tienda.com/food/iberico-meat.html .

Saturday, May 23, 2015

GRAPE LEAF WRAPS

Having inspected the grape vines on the terraced hillside, Fran, my gardener, announced it was time to prune them, “en verde,“ when the first bunches of grapes have appeared. He showed me the infant grapes and said the non fruit-bearing stems should be cut back, so all the vine’s energy goes into making fat grapes. Then, he said, it’s time to spray the vines against mildew.


Bunches of tiny grapes appear on the vines.
I asked Fran to bring me all the pruned leaves, before spraying. “What for?” he asked. To make stuffed grape leaves, I told him. Here in southern Spain, this is unheard of. But I’ve been using vine leaves from the arbor ever since I first found a recipe for them in A Book of Middle Eastern Food by Claudia Roden (I have a 1972 Penguin edition).

I usually make the version from that book with minced lamb and rice in the stuffing. But this time I found a recipe in Paula Wolfert’s Mediterranean Clay Pot Cooking (John Wiley, 2009) without meat, calling for rose petals mixed into the rice stuffing. I grabbed some of the fragrant petals before Fran got to them with the spray.

Grape leaves do appear in Spanish cooking as a wrap for food to be cooked over a wood fire. Vineyard workers, hunters, wayfarers on the Camino de Santiago, might snare wild birds or fish, wrap them with ham fat and vine leaves and grill them for a tasty meal. The grape leaves are not meant to be eaten; they flavor the food and protect it from the embers. 

Grape leaves have a lemony, citric flavor. I’ve used them, shredded, as a substitute for lemongrass in Southeast Asian recipes. I also use them as a pan-liner for oven-roasted chicken or fish.

Vine leaves enclose a stuffing of rice, raisins and pine nuts.

Stuffed quail, wrapped in grape leaves, ready for the grill.

Stuffed Grape Leaves

Stuffed vine leaves are cooked with garlic, lemon, tomato.

If you don’t have a grape arbor to provide (unsprayed) leaves, use the ones packed in brine from a Greek or Middle Eastern grocery.

3 dozen small, freshly-picked grape leaves
½ cup medium-grain rice
1 cup boiling water
3 tablespoons olive oil
1 small onion, finely chopped
2 tablespoons pine nuts
1 tablespoon seedless raisins
1 tablespoon chopped mint or dill leaves
1 tablespoon chopped parsley
Salt and pepper
1/8 teaspoon ground cinnamon
1/8 teaspoon ground allspice
Dried rose petals, crushed, or fresh (unsprayed), chopped (optional)
½ lemon, sliced
2 cloves garlic, slivered
1 tomato, halved and sliced
Water to cover the grape leaves
Greek yogurt, to serve
Chopped mint
Crushed garlic


Wash the leaves. Blanch them in boiling water for 1 minute. Drain and cool.

Place the rice in a heatproof bowl. Pour the boiling water over it and allow to stand for 10 minutes. Drain the rice and place in a bowl. Add 2 tablespoons of the oil, onion, pine nuts, raisins, chopped mint, parsley, ½ teaspoon salt, freshly ground pepper, cinnamon, allspice and rose petals, if using.  Mix well.

Working with one leaf at a time, spread it out, shiny side down, on work surface. Nip out the stem and discard. Place a scant teaspoon of the rice mixture at the stem end of the leaf. 

Fold up the bottom, fold over the side lobes, then roll the leaf up like a cigar.


Line a small pan or cazuela with slices of lemon. Drizzle with remaining tablespoon of oil. Place the grape leaves as they are rolled, seam-side down, in the pan. Pack them in as tightly as possible. Tuck slivers of garlic between the rolls. Add any remaining lemon slices and the sliced tomato. Add water to just cover the rolls, about 1 cup.

Place a heat-proof saucer on top of the grape leaves to prevent their bobbing up in the water. Bring the liquid to a boil, then reduce heat to minimum and cook until grape leaves are tender and rice is cooked, about 25 minutes.. Remove the saucer. Remove from the heat and allow to cool in the pan.

Invert the pan onto a plate, pouring off any remaining liquid. Serve the grape leaves room temperature or chilled, accompanied by a sauce of Greek yogurt mixed with chopped mint, crushed garlic and salt.

Vine leaves with yogurt-mint sauce.

Quail Grilled in Grape Leaves
Codornices en Hojas de Parra

Grilled quail wrapped in vine leaves.
Quail are farm-raised, not wild. Serve one quail per person as a starter or tapa, but allow two or three for each if they are to be a main course.

Use large vine leaves to wrap the quail. The leaves don’t need to be blanched, although blanching makes it easier to wrap the birds. Use kitchen twine to secure the leaves around the quail.

Vine leaves to wrap, raisins in the stuffing and, to follow the grape-y theme, a glass of wine with the quail. A fruity Tempranillo red or Verdejo white would complement the quail.

This is campfire food. Use your fingers to eat the quail!

4 quail, each about 5 ounces
Salt and pepper
Thyme leaves
1 tablespoon lemon juice
2 tablespoons olive oil
½ cup fresh breadcrumbs
2 tablespoons seeded raisins
1 tablespoon chopped bacon
1 tablespoon pine nuts
1 tablespoon chopped parsley
8 large grape leaves


Split the quail open through the breast bone and spread them open. Place in a non-reactive container. Sprinkle with salt and pepper, thyme and lemon juice. Add 1 tablespoon of the olive oil. Allow the quail to marinate at room temperature for 30 minutes or, covered and refrigerated, up to 24 hours.

In a small bowl combine the breadcrumbs, raisins, bacon, pine nuts and parsley. Add the remaining 1 tablespoon of oil and salt and pepper.

Open up the quail on a work surface. Place a spoonful of the breadcrumb stuffing on each. Close the quail. Use 2 grape leaves to wrap each quail, tying them with twine to make packets.

If grilling the quail, start charcoal burning. When coals are hot, place quail on grill at lowest position. Grill 10-15 minutes; turn the quail and grill another 10 minutes. 

To oven-roast the quail: preheat oven to 425ºF. Place the wrapped quail on a rack. Roast 15 minutes, turn them and roast 10 minutes more.

Unwrap the packets.


Stuffed quail are grilled to perfection.


Sunday, July 20, 2014

GRILLING ON A PLANCHA


Vegetables grilling on a plancha.

Summer means grilling season. I know that. But rarely do I fire up a charcoal or wood-fired grill for only one or two persons. Instead, I do my grilling on a plancha in the comfort of the kitchen.

Plancha means a metal plate. It’s also the word for “iron,” the sort you iron your clothes with. Nowadays, irons are electric, but I once lived in an old mill house in the country with no electricity. We heated heavy planchas on a gas fire to iron our clothes. I had a pair of them—one to heat while the other was in use. 

But, back to grilling on a plancha. In a tapa bar, a plancha is the same sort of griddle you might find in a fast-food joint for grilling hamburgers. Instead of burgers, the grill meister is cooking tiny squid; whole, unpeeled prawns; slabs of swordfish steak; pork cutlets, and small steaks, basting them with aliño, a mixture of olive oil, garlic, parsley and lemon. I am amazed at the skill, knowing exactly when to turn each piece of food, when to remove it from the grill.

A plancha is a great tool for home cooking. I prefer a heavy, cast-iron grill pan that heats evenly. Especially useful is a reversible one—ridged grill pan on one side, great for steaks, and flat griddle on the other, perfect for fish and shellfish. The plancha sets directly over a gas burner.

Hake steak on a flat plancha.

How to grill on a plancha: Place the plancha over high heat until very hot, about 4 minutes. Then brush the grill with olive oil and sprinkle with coarse salt (same procedure whether using a flat or ridged grill pan). Place food to be grilled on the plancha. Keep the heat on high to get a good sear on the food. Don’t move it around. Then turn it.

Timing is the tricky bit, just as it is with grilling on charcoal. It takes some practice to know when to turn the food, when to take it off the grill.

Chicken breasts on a ridged grill pan.
If you don’t have a plancha, substitute a large cast iron skillet. An extractor fan helps to draw out the smoke from grilling, but you might set off the smoke alarm in any case. By the way, any of the foods cooked on a plancha can also be cooked a la parilla, on a charcoal or wood-fired grill.

What I most like about plancha cooking is that it doesn’t need a whole lot of pre-planning—no marinades, rubs, brines required. But, plancha-grilled foods really do need a sensational sauce. Romesco sauce with grilled shrimp. Alioli (garlic-olive oil mayonnaise) with griddled lamb chops or rabbit. Piquillo pepper sauce with fish. Here’s a bunch more.

Aliño
Sauce for Grilled Foods


This simple sauce is spooned over grilled foods immediately before serving. Use it with griddled baby cuttlefish, grilled chicken breast or any fish fillet. The sauce can also be used as a marinade or basting sauce. Keep it handy when you´re grilling meat, poultry and fish.

Aliño in the making.
2 cloves chopped garlic
½ cup chopped parsley
3 tablespoons lemon juice
½ teaspoon salt
6 tablespoons extra virgin olive oi
l

Combine all the ingredients in a small bowl and stir to mix. Use at room temperature. Sauce may be kept, covered and refrigerated, for up to one week.

Grilled hake and vegetables, drizzled with aliño.

Mojo Verde
Green Chile Sauce with Cilantro


This spicy Canary Islands sauce is sensational with grilled fish, lamb, or vegetables.

Cilantro, garlic, chiles for mojo verde.
4 cloves garlic
1 green chile, such as jalapeño (or to taste)
½ teaspoon ground cumin
1 teaspoon oregano
½ cup chopped parsley
½ cup loosely packed fresh cilantro leaves
¼ cup olive oil
3 tablespoons wine vinegar
½ teaspoon salt
4 tablespoons water

   
Place all ingredients in a blender container and blend until smooth. Sauce keeps, covered and refrigerated, one week.

Squid and sliced potatoes are grilled on a plancha, served with spicy mojo verde. The squid was cut open lengthwise, edges snipped to prevent their curling and grilled whole, then cut in pieces to serve. The potatoes were partially cooked whole, then sliced and brushed with olive oil before placing on the grill pan.

Mojo Picón
Red Chile Sauce


Serve this as a dipping sauce for chips, with grilled chicken or meat.

Piquant mojo picón.
3 tablespoons pimentón (paprika), not smoked
1 fresh red chile, seeded and chopped, or cayenne to taste
4 cloves garlic
¼ cup extra virgin olive oil
3 tablespoons wine vinegar
½ teaspoon ground cumin
½ teaspoon salt
4 tablespoons water


Place all of the ingredients in a blender and blend until smooth. If desired, thin with a little water. Sauce keeps one week, refrigerated.

Grilled chicken and butternut squash with mojo picón.

Sliced chicken on grilled bread with spicy red chile sauce.

Salsa Cabrales
Cabrales Blue Cheese Sauce


Cabrales is a distinctive blue cheese from Asturias—sharp, but remarkably creamy in consistency. It makes a delightful dressing or dip when thinned with wine or, in the Asturian style, dry cider. It's a classic served with grilled entrecote steaks. But, you know what? I didn't really like the blue cheese sauce with the steak. It was delicious, however, with the potatoes and as a dip with endive leaves.

Makes 2/3 cup

5 ounces Cabrales or other blue cheese
2 tablespoons chopped onions
1/3 cup white wine, cider or cava (sparkling wine)
Pinch of cumin seed


Place the cheese in a blender with onions, wine and cumin seed. Blend until smooth. Serve immediately or keep, covered and refrigerated, up to 3 days.

Ridged grill pan gives a good sear to steak, sliced potatoes.